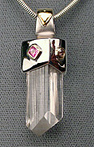
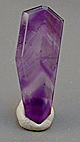
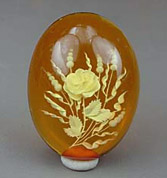
| GEM FASHIONING Preparing a gem for use in jewelry, or for display as an ornamental object, is known as fashioning. In certain cases no fashioning is done at all; the gem material is used just as it came from Nature. For example, attractively formed crystal specimens or metal nuggets are sometimes put on display stands, or mounted in jewelry as is.
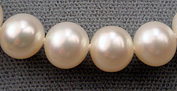
Perhaps the most common example is pearls. These gems, which are already in beautiful shapes as found, are occasionally put into their mountings without even drilling a hole in them.
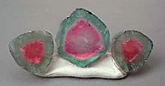
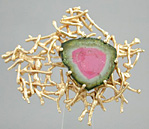
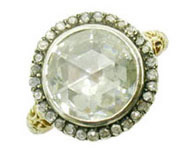
When metalsmiths mount an unfashioned gem, strategically placed prongs, or special adhesives are used to make attractive and secure settings. The pictures below show some of the ways in which unfashioned gems are used :
Danburite and Bicolored tourmaline crystals glued into bezel "cap"settings
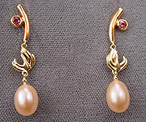
A baroque freshwater Cultured Pearl set in prongs
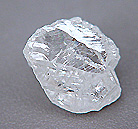
An uncut/unpolished macle "twin" Diamond crystal bezel set in a ring
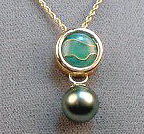
Tahitian Pearl glued to a dangle setting
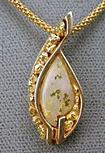
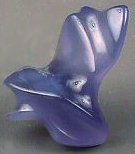
Natural Gold nuggets soldered into channel setting Along the same lines as the "Merman" is the pendant/brooch I recently had made from an unfashioned baroque freshwater pearl whose shape reminded me of a horse's head.
The vast majority of gems, however, are fashioned before they are used. The art and craft of fashioning gemstones is called lapidary (or diamond cutting), and a practitioner is known as a lapidary, (sometimes lapidarist), or a diamond cutter.
Here's another instance where we see evidence of the split in the gem world between diamonds and colored stones; this time it's in the terminology used to describe the fashioning process, and to name the craftsperson involved in it.
The History of Lapidary :
The roots of lapidary go back to the earliest history of human culture. The first of our ancestors that we can rightly say had "human" culture, developed crucial skills of knapping (flaking rock edges to make tools and weapons) and stone masonry. It was not very long after the fashioning and use of stone and organic materials for survival needs, that we find evidence of the beginnings of bead making, carving and engraving using those same materials.
Not only do these artifacts tell archeologists that our remote ancestors had an aesthetic sense, they also signify how remote are the beginnings of the social and economic hierarchies so characteristic of humankind.
How long have personal computers been a part our life? Maybe 30 years at most: my own first machine was acquired in 1980. In those thirty years most of us living in the "modern" world have learned some rudimentary skills and are using them to accomplish basic tasks. Some individuals among us, however, have become expert users of the greatest talent and sophistication. In today's world it might not be too much of a stretch to say computer savvy is a survival skill. So....
Imagine a world in which rocks, and certain organic materials like bone, horn and shell, are not only ubiquitous but also necessary for survival. That world lasted for many thousands of years and the consequences of not mastering the technology were far greater than not getting a high paying job or being unable to download a tune or write a blog.
During this huge period of time, humans developed highly sophisticated and successful techniques for working with these minerals and organic materials. Once the abilities were present, they were passed on, and improved as part of a people's cultural heritage. But how did they get started? The most likely answer is that our ancestors put to use what they saw happening in Nature around them!
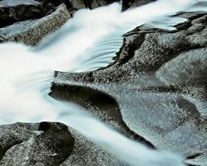
Simple observations like the smoothing effect of flowing waters and their sediments on stones, the sharp edges formed when certain sorts of rocks broke open, and the realization that some rocks could make marks or grooves on others could be made every day. These observations contained the information that led ultimately to the controlled use of abrasion, cleavage, fracture and hardness differences to shape, drill and decorate stones.
Erosion at work rounding the edges of rock It is not surprising that many of the first tools and ornaments were of the relatively soft, easy to work organics or minerals, such as wood, shell, amber, coral, horn, bone, turquoise and soapstone.
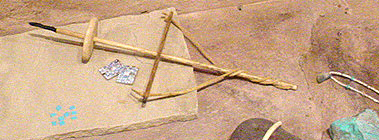
Early Paiute twist drill for making shell or turquoise beads One of the most pervasive themes I've encountered in my own review of lapidary origins is that the dates for various innovations keep getting pushed back further into pre-history as new archeological discoveries are made. Here are some recent examples of that, which, you might find interesting :
1. 75,000 year old drilled snail shell beads, were recently discovered in S. Africa, pushed the origin of the first jewelry back 30,000 years earlier than previously documented. (Original article: Henshilwood et al., Middle Stone Age Shell Beads from South Africa, Science 2004 304: 404 ).
2. Archeologists recently found a polished axe head from China dated to about 2500 BCE. This tool with a mirror-like shine on its surface was made largely of corundum. Both logic and laboratory simulations supported the idea that diamond (the only mineral harder than corundum) must have been used as the polishing compound prior to this find, diamond had not previously been documented to be in use until thousands of years later.
3. Check the web: The first documented use of a "compound machine" (two or more simple machines used in combination to do a job), in this case a lathe-like device, comes from the recent discovery of ancient Chinese jade burial rings, dated to about 700 BCE, This find, pushes the use of such tools nearly 800 years back from the previously known date of the first century CE. Original article: Lu, Early Precision Compound Machine from Ancient China, Science 2004 304: 1638.
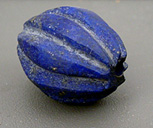
Ancient Babylonian "melon" bead of lapis lazuli, circa 3000 BCE Lapidary Products :
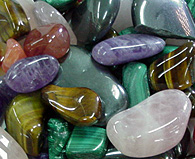
Tumbled
stones :
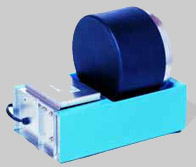
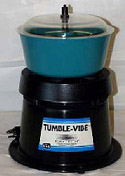
It is accomplished by mixing the rough gems with water and a series of ever finer abrasives, and either tumbling them in a motorized, rotating rubber-lined barrel, or subjecting them to prolonged vibrations.
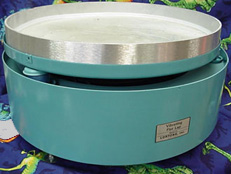
A Rotary Tumbler
A Vibratory Tumbler As the stones hit each other and the abrasive materials, tiny cleavages and fractures occur slowly rounding sharp edges and corners.
Each stage (usually 3 or 4) typically takes about two weeks so that from rough to tumble-polished gems takes considerable time. Tumbling is not a craft for the impatient. It can also be noisy and messy, but the product at the end is very pretty.
An assortment of Tumbled stones The smooth, shiny tumbled stones can be used as accents in aquaria, or as decorations in the garden, or in the pots of houseplants. They can also be glued to "bell cap" findings, and made into pendants, charms or keychains. They are sometimes drilled to make baroque beads.
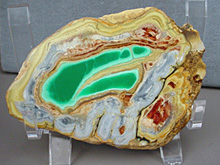
Slabs
and slices :
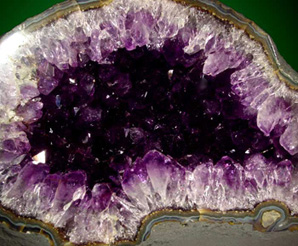
Sawn Amethyst geode weighing 10.5. lb Lapidary saws come in a variety of sizes from tiny facetors' trim saws with four inch blades, to standard rock slicing saws of 8 - 18 inches, to giant behemoths used to cut boulders.
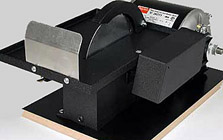
A small lapidary saw
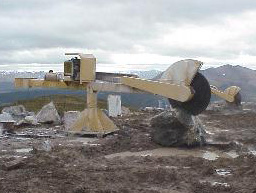
A giant saw used in preparing jade boulders during the mining process Unlike the blades of more familiar wood saws, lapdiary saw blades do not have teeth per se. In fact, what we call sawing, in lapidary, is really a grinding process. The blades are generally thin round disks with an abrasive grit such as silicon carbide, emery, or diamond embedded into the rim.
Lapidary saw blades
Plain and Notched The
rocks may be hand held or, more commonly, secured with a vice.
Such saws must be used with coolant, usually some type of oil,
to dissipate the great heat from the friction generated during
cutting.
Grinding and Polishing :
Once a gem has been sawn into slices or trimmed into manageable size, it is then ground to smoothness and polished to a luster. The grinding machines employ a metal, or in some cases resin, disk with its surface or edge covered with abrasives or polishes of various grit sizes and types. These disks come in two basic styles: flat "laps" which are used horizontally, and upright "wheels" which are used vertically.
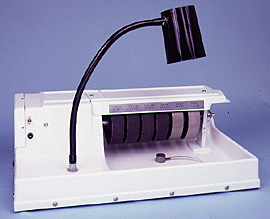
A horizontal "flat lap" used primarily for slices and the bases of carvings and cabochons
A combination grinding/polishing unit with vertical "wheels" used primarily for producing cabochons The basic idea here is the same as in tumbling, in that the gem is subjected to grits of increasing fineness as it is shaped and made smooth, then finally a polishing compound is applied which produces the finished shiny surface. The polishes are usually metal oxides or extremely fine grits of diamond. Various abrasives and polishes must be used to achieve success with different types of gem materials, based on their hardness and surface characteristics.
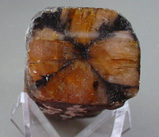
Polished slices are sometimes used in jewelry, but more often are displayed as specimens, or ornamental objects such as bookends, wind chimes, or with translucent material, "sun catchers".
Polished slices of a bicolored tourmaline crystal will make lovely jewelry
Contemporary Brooch
Specimens of nodular Variscite and Chiastolite with cut and polished front surfaces used for display Cabochons :
They are usually produced with a slightly beveled bottom edge which makes for easier and more secure setting in jewelry. Sizes range from tiny accent gems to large pieces appropriate for use as belt buckles or in bola ties. Standard shapes such as ovals and rounds are commonly produced in "calibrated" sizes that fit exactly into commercial mountings. In other cases, particularly with rare or valuable material, or those intended for designer jewelry, the sizes aren't standard, and the shapes may be freeform.
Lapidary Keith Horst
Cutting a cabochon of Chrysoprase
Round Fossil Ammonite
Cat's Eye Apatite
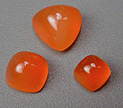
Carnelian Set
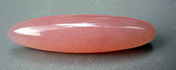
Long Oval Hydrogrossular Garnet
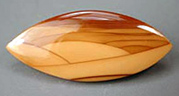
Boat Shaped Bruneau Jasper Some common variants of the cabochon form include gems cut with a series of curves that meet on top to form an apex rather than a standard smoothly curved dome, and those whose top is a flat table, a type usually referred to as a "tablet". Cabs of very dark translucent material, like deep red almandite garnet, are sometimes cut with the back hollowed out to lighten their color.
Covellite cab with an Apex top
Tablets of Amethyst
Dendritic Chalcedony Beads
:
Beads are simply gems with holes in them. The fashioning of a round or other symmetrically shaped bead can be done by hand with cabbing equipment, but in commercial operations is usually done with a device called a "bead mill". Sawn slabs are cut into cubes (for a round bead) and fed into the mill which has grindstones that operate at angles to the cube removing its edges until it is uniform. Most mass produced beads then go into a tumbler to be polished and are drilled with a lapidary drill press, using diamond tipped drill bits.
The hole can be completely through the gem, or only part way through, in which case it is said to be "half drilled". Most commonly half drilled beads are used for stud earrings, rings or dangles. Depending on which direction they are drilled (side to side or top to bottom), and whether the drilling is centered or not, full drilled beads find various uses such as in bead strands and as dangles.
Beads can be virtually any shape : round, oblong, tubular, flattened circles (rondells), briolettes, fancy or baroque.
Side to side drilled Pearls
Half drilled Pearls
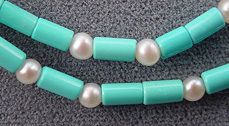
Tubular Turquoise beads with Pearls
Top to bottom drilled Jet beads for dangles
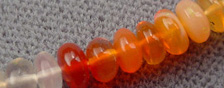
Non-centered side to side drilled Carnelian briolettes for dangles
Fancy Cabochon bead
Rondell strand of Mexican Opal
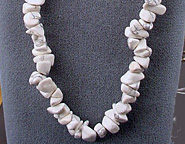
Baroque (tumbled) bead strand of Howlite Engraved
and Carved Gems :
Engraving and carving should be considered lapidary arts rather than crafts, as the vast majority of styles and pieces can only be done well if the maker has some degree of artistic talent, an ability not required of those doing tumbling, cabbing, or bead making. Although the majority of such pieces are orginal works of art, more and more use is being made, especially in commercial production of gem carvings, of ultrasonics and lasers which are sometimes computer-assisted, and may be used to produce many exact replicas of a single original carving.
Engraving and carving gems is, like bead making, a very early form of lapidary. Historically, such pieces were done by hand with bone, stone, or metal tools and suitable abrasives. The choice of tools was dependent on what was locally available, and on the hardness of the material being worked. There are still a few hand carvers who carry on this tradition. For the most part, though, today's gem carvers and engravers use electrically powered tools with silicon carbide or diamond tipped implements.
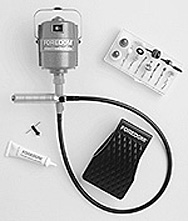
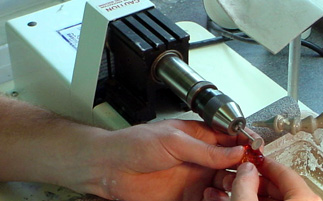
One of the most commonly used tools for carving and engraving is the "flex shaft" which consists of a motor which drives a pen-like device with a rotary head that can be fitted with dozens of different cutting, drilling, carving, sanding and polishing tools.
A flex shaft tool with an assortment of "bits" When using a flex shaft, which is usually hung on a stand and operated by a foot switch, the item being worked is mounted in a vice or held stationary in some way while the rotary tool, held like a pen in the hand, is used to grind or polish it.
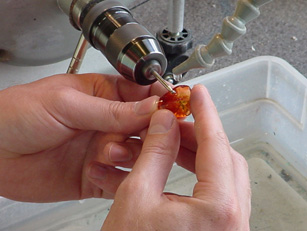
Alternatively, many artists favor a reversal of this system whereby a "fixed arbor" which contains the rotating tools sits on their bench, while they hold the item to be carved in their fingers, and apply it to the tool.
Differently shaped diamond tools
With such a long history, it is not surprising that a large number of different carving styles, as described below, have been developed and made popular.
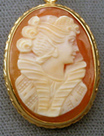
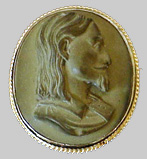
1. Intaglio :
Contemporary shell Cameo
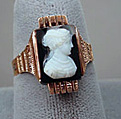
Antique "hardstone" Agate Cameo ring
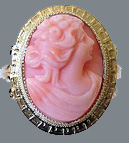
Victorian Lava
Coral Cameos 3.
Scrimshaw :
A 19th century American sperm whale tooth scrimshaw pendant
Contemporary painted scrimshaw (on legally collected elephant ivory)
Contemporary Native American scrimshaw (on legally collected whale baleen) 4.
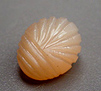
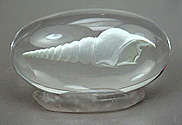
Surface engraving/carving :
Surface carved Aquamarine
Emerald
Moonstone Cabochons
Carved rock Crystal Quartz
Amber
Rock Crystal Quartz 5.
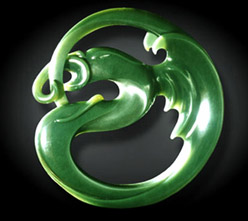
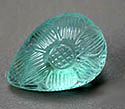
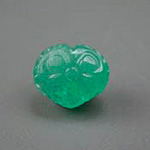
True Carving :
Hololiths are hollow, three dimensional jewelry pieces, usually rings or bangle bracelets that have been carved from a single piece of stone. Some of the most charming of these consist of two or more interlocked pieces.
Representational carvings are meant to resemble the subject as closely as possible. In stylized carvings, we recognize the subject matter, but the artist has put their own interpretation on it. Abstract carvings are made as pure expressions of form with no overt reference to real objects. HOLOLITHS
Jadeite interlock bracelet
A Poppy Jasper bangle bracelet REPRESENTATIONAL CARVINGS
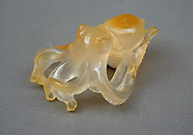
Chalcedony Octopus
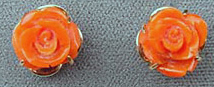
Coral Roses STYLIZED CARVINGS
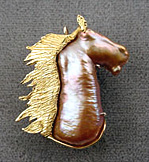
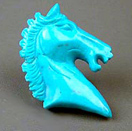
Turquoise Horse ABSTRACT CARVINGS
Sugilite
Jasper Faceted
Gems :
Colored
stones :
The brilliant cut which is especially suited for producing light return to the eye (brilliance), has triangular and kite shaped facets. The step cut, which is more suited for emphasizing color in a gem, has tiers of rectangular to square facets. Mixed cuts usually have a brilliant style crown with a step cut pavilion, but the opposite arrangement can be seen as well. Occasional variants include faceted gems with an apex rather than a flat table, and those whose crown is formed of rows of parallel facets (opposed bar cut) or a field of intersecting squares or diamonds (checkerboard cut).
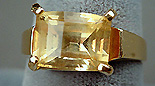
Oval brilliant cut Amethyst
Square step cut Amethyst
Oval mixed cut Blue Zircon
Apex cut square Mexican opal
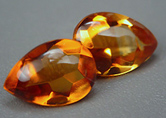
Rectangular opposed bar cut Citrine
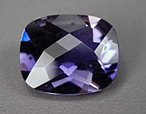
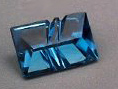
Rectangular cushion checkerboard cut Iolite Less frequently seen variations of the faceted gem are buff tops, briolettes, concaved cuts and fantasy cuts. A buff top gem has a faceted pavilion with a smoothly domed (cabbed) crown. An interesting magnifying effect of the pavilion facets is achieved by doing this. The briolette (mentioned earlier as a popular bead style) is a three dimensionally faceted gem, usually in a pear or tear drop shape. Concave cuts have, logically, concaved or sunken in facets on either the crown or pavilion or both. This technique increases overall light return and creates unusual reflective patterns and/or face-up outlines. The "laps" which are used for concave cutting are cylindrical. Relatively few facetors have the equipment and expertise necessary to produce stones of this sort. Extra time to attain a good polish, and more expensive equipment are two factors which tend to set a premium price for such gems. Fantasy cuts have carved areas on the crown or pavillion, which may be polished, or left unpolished to create special effects.
Buff top pear shaped Citrines
A selection of Briolettes
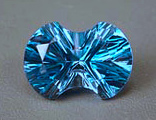
Fantasy cut London Blue Topaz
Fantasy cut Citrine with unpolished carved channels on the pavilion to create a "bullseye" effect The Faceting Process :
Faceting is the newest of the major lapidary crafts. Historically, we don't find the first faceted gems until the 14th century and faceted diamonds don't make an appearance until the 16th century. The earliest cuts were done by hand, and had just a few facets. An example of an early, but still occasionally used cut, is the rose cut which was often chosen for early diamond jewelry. The rose cut has a flat bottom like a cabochon, with a series of facets rising to form a dome or apex.
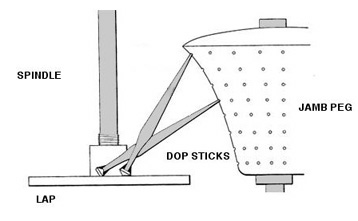
Several hundred years ago the jamb peg faceting machine came into use, and faceting, as we recognize it today, began. In order to cut facets on a gem in an organized manner that results in a precise arrangement, three factors must be controlled: 1) the angle of the cut 2) the depth of the cut and 3) the radial placement of the cut. Although modern highly engineered faceting machines have replaced jamb pegs in much of the world, these older systems are still widely used, and a substantial proportion of the gems in commerce today have been cut by them.
Typical antique rose cut Diamonds in a circa 1840 brooch (the diamonds in this piece were probably already antique when it was made)
A modern-day rose cut Diamond in a contemporary "antique style" ring Background Information on Faceting :
Pavilion and Crown: In the faceted gem, the pavilion and crown have different functions. The crown acts as a window or lens to collect the light which strikes it, and direct or focus it into the pavilion of the gem, whereas the pavilion must act as a mirror to reflect that light around the pavilion, and then back to our eyes through the crown. If the pavilion fails to do so, the gem lacks brilliance and is lifeless. Crown angles are much less crucial to the optical performance of a gem than are those of the pavilion, and can vary substantially from stone to stone without severely affecting a gem's brilliance. The crown and pavilion are cut in two separate sequences of operations. The gem is initially adhered to the "dop stick" until one side is finished, then removed, turned exactly 180 degrees, and attached to a new dop, to go through corresponding operations for the other side.
The
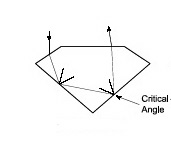
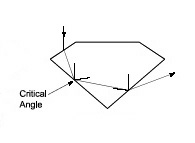
Critical Angle :
Think for a moment of skipping flat stones on water. What controls whether the stone will skim and bounce along the surface, or go kerplunk into the depths?.......The angle at which it hits the water! So it is with light that enters a gem and strikes the pavilion facets. When that beam hits outside the crtical angle it will be reflected to another facet and/or to the crown, but if it hits inside the critical angle it will not reflect, but pass right out through the side or bottom of the gem, not to return to our eye the gem loses brilliance.
In the graphics below we see two gems cut to the same proportions (pavilion main angles at 38 degrees) one is a diamond (RI = 2.42), the other is a fluorite (RI = 1.43). The critical angle for diamond is about 24 degrees, that of fluorite is 44 degrees. At 38 degrees on the pavilion facets much of the light hitting the fluorite is lost, whereas almost all that which hits the diamond is reflected. The diamond would appear bright and the fluorite lifeless, especially in the center: we would say it has a "window". If, instead, we were to cut the fluorite to a pavilion angle of 45 degrees or above, we would then eliminate the window and it would be brilliant, and conversely we would get a lifeless diamond if we were to cut its pavilion at 20 degrees or below.
Reflection when the pavilion angle is above the critical angle
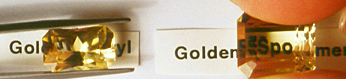
Lack of reflection "windowing" when it is not In the first picture below you can see two similar looking gems (each is light yellow and rectangular). The golden beryl gem on the left was cut with its pavilion facets above its critical angle, and it appears brilliant, the yellow spodumene on the right was cut with the pavilion facets below its critical angle and has a "window". We call it a window because the light passes right through it, like window glass, so that you can easily read the printing underneath. The second set of pictures shows a top and bottom view of a badly windowed topaz. You can see how shallow (low angle) the pavilion is. In order for this gem to be fully brilliant, the necessary recutting would reduce it's face up diameter and carat weight substantially.
Non-windowed and windowed gems
Yield
vs Brilliance, Clarity and Color :
For
example :
2. Included rough can be oriented (with loss of yield) to eliminate or minimize the appearance of inclusions.3. Pleochroic stones will give different colors and different yields depending on how the stone isoriented for cutting.
4. Rough that happens to be somewhat "gem shaped" yields
more than thin and flat, or highly asymmetrical rough. Given a
moderately well shaped, clean piece of rough, which is cut to
correct pavilion angles, the average yield is about 20%. To put
it another way: start with gem rough = 5 ct, end up with finishedgem
= 1 ct.
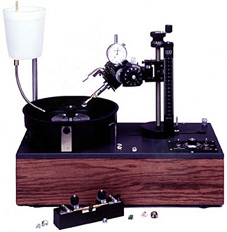
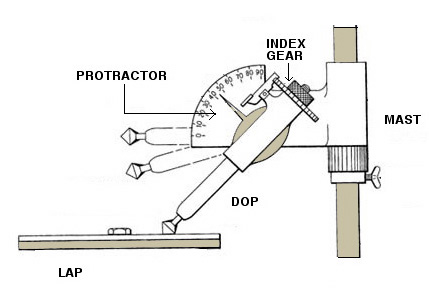
A jamb peg faceting machine A modern, highly engineered faceting machine is seen below: such machines accomplish the same three goals (angle, depth, and radial position of facets), but do so with great accuracy. In machines of this type the dop stick with the gem attached to it, is fitted into a "quill" which can be postioned at various precise angles via the "protractor". The quill moves up and down on the mast, which gives great control over the depth of cut, and a slotted index gear gives accurate control over the radial placement of facets. Stones cut on such equipment are usually described as "custom cut".
Before summarizing the differences between the products of the two types of machines (which is going to make the native cut gems sound pretty lame), let me say that it takes long training, and tremendous skill to be able to produce a nice looking gem with a jamb peg, whereas virtually anyone who can read the lapidary equivalent of a cookbook can produce an acceptable stone with modern machinery!
A typical modern faceting machine Native
cut gems :
Such cuts give high yield from gem rough, and due to the increased volume/mass of the pavilion tend to deepen and emphasize color. For these reasons the majority of the high value colored gem rough (ruby, sapphire, emerald, Imperial topaz, etc) is still cut this way even though the cutters could make smaller, brighter stones with the equipment they have. Frequently native cutters are paid by yield, another factor which perpetuates the native style of cutting.
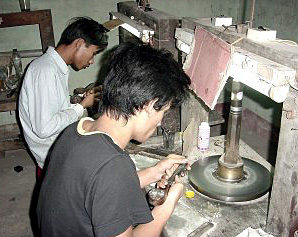
A few native cutters working in certain gem factories (such as the one pictured below) pride themselves on producing custom-style gems, a feat all the more impressive given the equipment available to them. Every angle and facet placement is determined by eye alone.
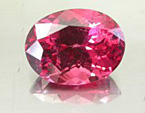
Native cutters in Vietnam, working on spinel and ruby, one of their custom-style gems
A pink spinel Custom
cut gems :
Such cutting sacrifices yield, and may lighten the color tone of gem material. On the other hand custom cut stones are generally easier to set in commercial mountings, and extremely beautiful due to their brilliance and symmetry.
Faceting Paraphernalia :
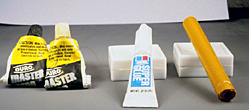
Various adhesives are used in faceting, such as epoxy resin, cyanoacrilate "Super Glue", and faceting wax. Different gem cuts require different index gears, the one below has 96 slots and can cut gems with 3, 4, 6, 8, 12 and 16-fold symmetries (other indices would be used for gems with 5 or 7-fold symmetries). The dops are commonly made of brass and come in a large variety of sizes. Seen below are three: a flat, a cone, and a "vee". Each is used for rough of certain shapes, or during different points in the faceting process.
Lapidary adhesives (epoxy, "super glue" and facetors' wax)
Afaceting index gear
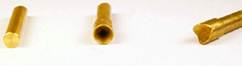
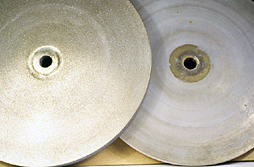
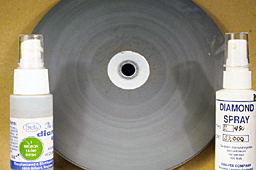
Brass Dops The laps used for cutting and polishing come in a variety of materials and sizes. The first picture below shows two diamond-surfaced cutting laps: the one on the left has a coarse diamond grit embedded into its metal surface, it would be used to lay in the basic shapes of the facets, the other one has finer grit and would be used to smooth the facets and prepare them for polishing. The second picture shows a polishing lap which is made of a plastic resin with fine metal particles embedded in it, very fine grit diamonds (in solution) are sprayed onto the lap surface for polishing the gem. Metal oxide slurries or sprays (such as cerium or aluminum oxides) can also be used for some gem materials. DIAMIND CUTTING LAPS
Coarse and Fine
Resin-metal gem polishing lap with diamond sprays The
"faceting cookbook" :
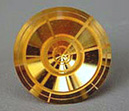
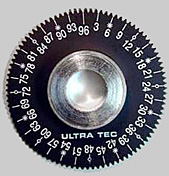
In the graphic below "B" = bezel facets, "M" = main facets, "S" = star facets, and "T" = table. ID indicates the "12 o'clock position" for the index gear. (On the left is the pavilion cutting diagram, and on the right the crown cutting diagram).
Round brilliant faceting diagram For example, the first instruction in such a facetor's "cookbook" might say (for quartz) "Cut 8 equidistant 42 degree facets as the pavilion mains, so that they meet to form a culet". This would be followed by something like: "At index settings on either side of the main facets, cut 16 bezel facets at 44 degrees". The directions would continue through the entire cutting process like following a recipe in a cookbook.
Actually, there is a bit of finesse to it, and quite a lot to learn, but faceting is nothing which requires high level mechanical, manual dexerity, or mathematical skills, and is enjoyed by many as an interesting hobby.
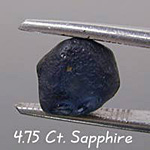
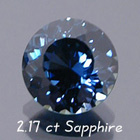
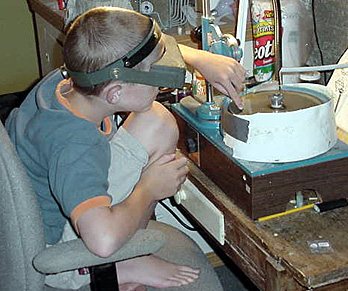
From rough Sapphire to custom faceted gem To emphasize my point that faceting should not be viewed as an especially intimidating craft, here's a picture of a successful new facetor: the 10 year old grandson of well respected cutter, Barry Bridgestock. The stone shown is his second production, and he did have guidance from Grandpa but not bad.
A Blue Topaz cut by Jake Diamond
cutting :
The cutters must be adept at getting maximum yield while still retaining good brilliance. A 1-2% difference in yield would be small potatoes for most colored gem cutters, but in the case of a diamond, many dollars could hinge on it.
A "natural", a small unpolished area left on the girdle of a diamond, far from being a blemish, is a considered a sign of superior cutting meaning that the cutter has gotten the biggest stone possible from a particular piece of rough. In today's diamond cutting industry computerized angle analysis, and computer assisted design (CAD), is often used to help cutters maximize yields.
In order to get the highest yields, most diamonds are cut with slight to moderate deviations from the "ideal" proportions, resulting in some loss of brilliance and/or dispersion. There are diamond cutting firms, though, which specialize in "ideal cut" diamonds. These stones are, on average, at least 10% more expensive per carat than "run of the mill" diamonds. In truth, only a well trained eye can detect these subtle differences in proportions, dispersion and brilliance, but as with any product, there are those who are eager to have the "very best", and quite are willing to pay extra for it.
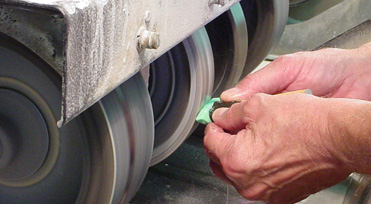
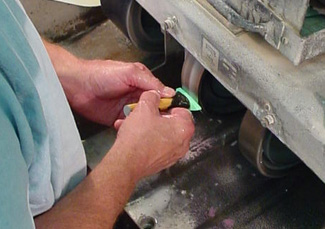
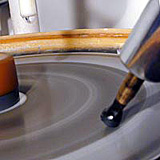
The equipment used in diamond cutting is heavy duty, reflecting the tremendous forces and long periods of time necessary to cut and polish this hardest of all materials. The lap, called a "scaife", is made of cast iron, and revolves at about 3000 rpm. Diamond "bort", in oil, is used for cutting and polishing. The stone is held by a "tang" which is a claw-like mechanism (no adhesive could withstand the intense heat generated by cutting).
The cutting and polishing process is really one of simple (but painstaking) abrasion as the tiny diamond crystals in the oil, being forced against the rough with great speed and pressure, successively wear away minute bits of diamond from the surface, gradually making it more smooth and uniform. Because the bort particles are randomly oriented, there are always at least some whose exposed crytal faces are harder than the surface to be polished (this is true as long as the diamond has been properly oriented for cutting to begin with its own hardest crystallographic axis cannot be directly parallel to any facet.)
The directions in which a diamond can be polished are called its "grain" and there are three basic types of rough (and many variations on those) each with a different pattern of grain directions. During the cutting process, as the different grain areas are brought to the scaife, the direction of the polishing must be altered. Twinning in diamonds can greatly complicate the cutting process as there will be an overlapping of harder and softer axes. Only a few firms specialize in cutting twinned crystals.
Diamond cutting centers in New York, Mumbai, Antwerp, and Tel Aviv produce the large majority of the world's diamond gems.
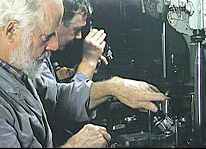
Although there certainly are "master" cutters who can start with a piece of diamond rough, and go through all the steps to produce a finished gem; in the commerical world of diamond production, the process is usually divided into stages, each of which is accomplished by a specialist in that part of cutting.
1. Marking :
A Diamond being prepared for cleaving or sawing by the "marker" 2.
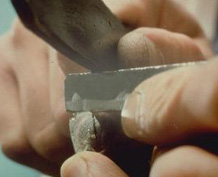
Cleaving and/or sawing :
A Diamond being cleaved
A Diamond being sawn 3.
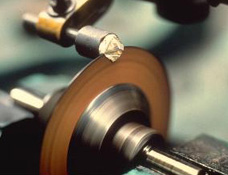
Bruting :
The bruting process
A Diamond with a "bearded" girdle 4
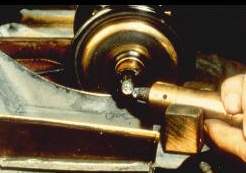
& 5 Blocking & Brillianteering :
A diamond in the cutting process, note the tang holder and the spinning scaife BEFORE AND AFTER
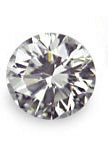
A rough Diamond
A brilliant cut Diamond |